| Introduction to time-lapse (interval) photography |
Time-lapse photography is a process in which a camera takes a picture at a given interval for a certain period of time. The result of this process can be either a folder with a series of images which can be viewed as a rapid slideshow, or a single movie file which was created from these individual images using dedicated software. Regardless of whether we use a slideshow or movie file to visualize the captured images, we review the images at a much higher speed than they were originally captured. Processes which under normal circumstances are rather slow get set into motion with time-lapse photography - e.g. formation and decay of clouds, sunsets and sunrises, polar lights, plant growth or blossom of flowers, cell splitting and growth of microorganisms, construction of buildings, traffic in a city, and many others. Images from geostationary weather satellites, when shown as movies or loops, can also be considered a special type of time-lapse imaging, though taken by much more expensive and sophisticated technology (which we will not discuss here). Time-lapse sequences can be taken either for scientific and educational purposes, or just for fun.
My first experiments with "timelapsing" date back to 2003, since 2005 I began to take timelapse series more frequently, and presently timelapsing is my biggest hobby. My website devoted to interval shooting originated between 2005 to 2008, however most of the principles below are valid even nowadays (2023). Presently, timelapsing is much easier than some 10 - 15 years ago, on Internet we can find many spectacular timelapse movies (reaching the level of art), typically taken with more sophisticated techniques than what I use. Most of my timelapses are without a music, just plain video, showing longer periods of evolution of some meteorological or atmospheric phenomena, and some of them aimed at beauty of the night sky. In some cases I try to combine my timelapses with satellite or radar data. I'll be glad if some of the timelapses are used for education at any level, starting with small kids, trying to attract them by processes in the atmosphere, up to university training of future meteorologists or pilots ... or simply for pleasure of anyone, who occasionally looks up in the sky.
There are several ways how to capture a time-lapse sequence, each having its own advantages and disadvantages. We will specifically focus on capturing clouds and various other atmospheric phenomena; however, most of the issues discussed below can be applied in general. What makes time-lapse photos of clouds unique compared to other targets is the speed of cloud evolution and motion, which demands time-lapse intervals on the order of several seconds. For most of the cloud types the optimal interval is about 5 seconds, but for rapidly changing clouds we may need to go down to about 1 second, while on other occasions 10 seconds is just fine. Thus the ability of a camera to shoot time-lapse at intervals between 1 and 10 seconds is our first, most important camera feature. Most of the clouds we wish to capture by time-lapse photography occupy large portions of the sky, so a wide angle or fish-eye lens is another important demand. Since the evolution and motion of clouds usually result in significant and rapid changes of brightness distribution over the frame and time, we need either to fix the camera exposure somehow - preferably by full manual exposure control of the camera (M mode). In other cases, such as timelapses taken around sunset or sunrise, demand using some form of exposure control over the time. Finally, the last feature which is essential, is manual focus of the camera lens, or an option to lock the lens to pre-defined infinity. This bypasses a potential problem in some cameras when attempting to focus on clouds, and also saves the camera's energy supply.
There are two basic methods of time-lapse photography:
Control of the camera by an external device. This external device can be either a notebook, tablet, smartphone, or a special piece of hardware designed and constructed specifically for this purpose - external remote timer. Connection of the external device is either via a cable, or wireless (Bluetooth, WiFi); permanent wireless control may heat up your camera significantly, resulting in increased noise of your images (namely at longer exposures and higher ISO). And of course, wireless connection may drain your battery much faster. When controlling the digital cameras from a notebook or smartphone, the captured images may be stored either on a memory card of the camera itself, or directly on a hard disc of the steering computer. Due to large amounts of data captured in a timelapse sequence, storing these on smartphone may fill your smartphone storage quickly.
Internal time-lapse feature of the camera itself. All you need is the camera itself, a good steady tripod, and a supply of batteries or a powerbank, and larger memory cards; you are then ready to shoot time-lapse wherever you go - hiking, mountaineering, or any other place where you happen to be without a computer.
Presently, most of (advanced) cameras already meet all of these requirements.
One final important note: shutters of cameras have a limited lifetime (shorter for DSLR cameras), so you might prefer for timelapsing a cheaper compact or system camera, rather than a DSLR. Also, if your camera has an option of setting electronic shutter only (on some cameras called "silent shooting"), always use it when timelapsing - this can prolong the camera's lifetime significantly.
---------------------------
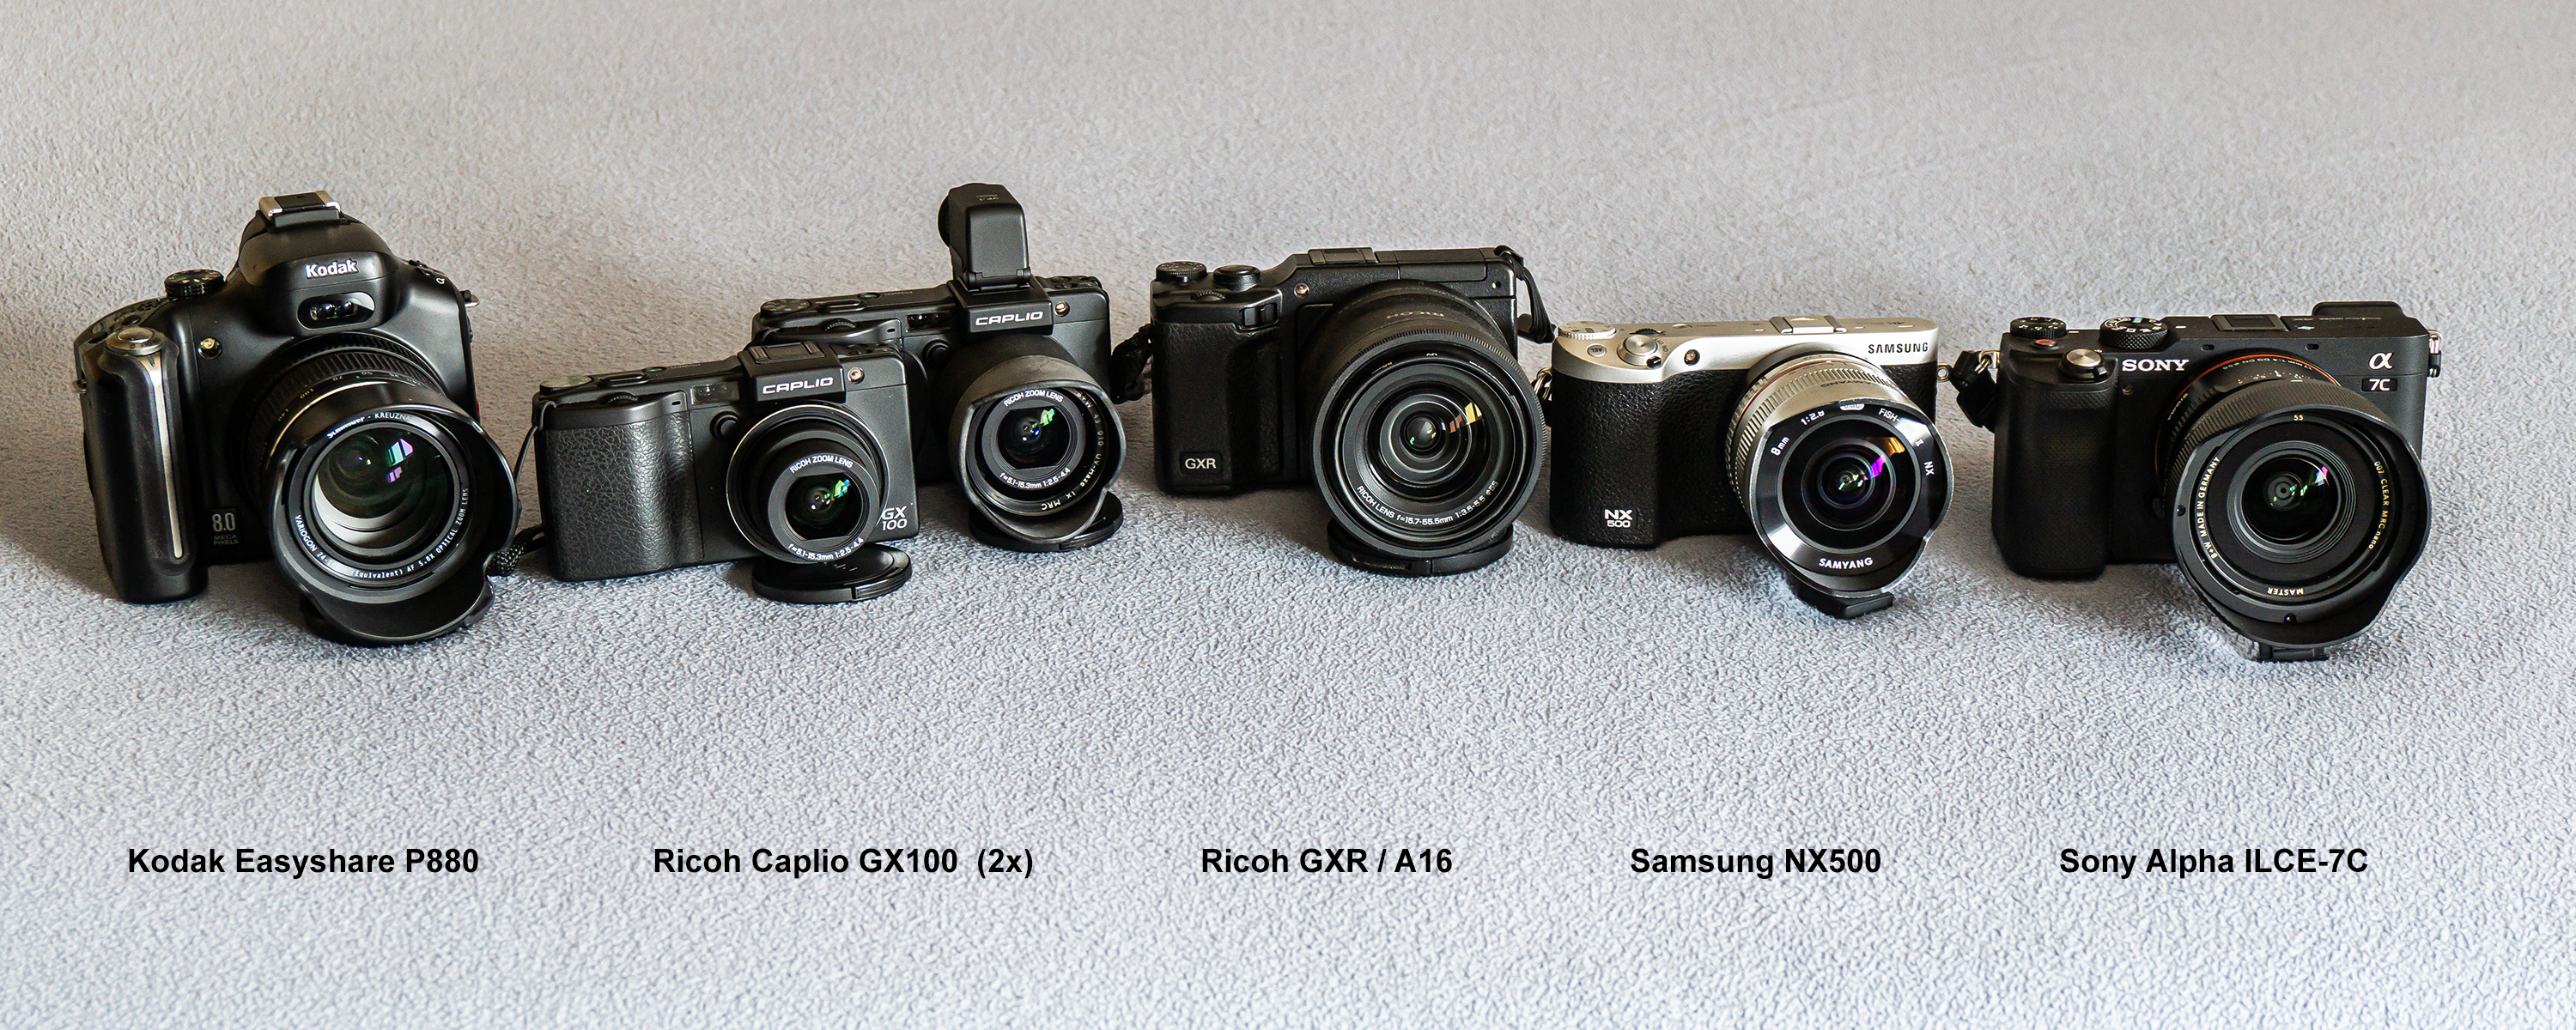
My first time-lapsing camera was Kodak Easyshare P880, which I used in 2006 and 2007 it had a great wide-angle lens (24 mm equiv.), pre-defined infinity setting, very good colors and excellent exposure dynamics. Its time-lapse started at 10 second interval, but it had a limit of 99 shots :-(( The limit meant that for longer sequences you had to re-launch the time-lapse mode over and over again, every 16.5 minutes - which was the main disadvantage of that camera. The 99-shots limit was finally the main reason why I switched in December 2007 to Ricoh cameras.
Switching to Ricoh GX100 cameras, with the shortest adjustable interval of 5 seconds and unlimited number of shots in a series (limited only by memory card capacity and battery life) was a huge leap forward for me at the time. I used two Ricoh GX100s between 2008 and 2015; their main weakness was the ease with which dust could get on the camera sensor (and thus the occasional need to send it to a service center in Germany for cleaning). In 2012, I bought a "system" Ricoh GXR with A16 module (that already had an APS-C sensor, apparently sealed against dust), with which I also switched to processing timelapses from raw files. Its weakness was high noise at higher ISO settings, severely limiting its use for night sky timelapses. More about interval shooting with Ricoh cameras here.
In 2016, I bought Samsung NX500 camera (with Samyang 12mm F2.0 NCS CS, Samyang 8mm F2.8 UMC Fisheye II and Asahi Takumar SMC 55mm F2 M42 lenses), whose APS-C sensor is significantly better than that of Ricoh GXR A16, namely in lower light conditions. For interval shooting I use an external controller, details here. With this camera I have taken many nice timelapses (presently - 202/07 - the camera has taken about 200 thousand images), and I still use this camera.
Finally, in early 2023 I bought Sony A7C camera (with FE 28-60mm F4-5.6, TTArtisan 11mm F2.8 ED Fisheye and Sigma 17 mm f/4 DG DN Contemporary lenses), my first full frame camera.
---------------------------
When creating a movie file from a sequence of images, you will need a software which can do this for you. During my first ~ 10 years of timelapsing, I was shooting into JPG format. In such case, first you will need to resize the original images to a movie file format - of course you can shoot the images directly into the final smaller size, but I preferred to shoot to the larger file size and resize/crop the images afterwards (I used Adobe Photoshop for this step). Next, you need a tool to create the movie file from the static images. There were more options for this - I was using RAD Video Tools to construct the AVI files, VirtualDub for their processing and tuning (if needed), TMPGEnc to convert those into MPEG1 files, MPEG Streamclip or QuickTime 7 Pro for QuickTime H.264/MOV conversion, or MediaCoder into H.264/MP4 format. For details about creating the movie file from a sequence of images using the above method see my archived 2008 step by step guide (not updated anymore, from today's perspective already obsolete).
Presently, when shooting timelapse series, I use RAW format only. For processing of these I use LRTimelapse software (in combination with Adobe Lightroom). In some cases I still use Adobe Photoshop for additional image manipulation. Finally, for conversion of processed image sequences into movie files (with H.264 or H.265 compression), I use VirtualDub2.
More information about time-lapse photography and its history can be found e.g. at Wikipedia.